Get Started
Quick Start Guide
Less setup, more building. This guide gets you from purchase to a running project fast. And shows you how the architecture is laid out so you actually understand what you're working with.
Last updated: 2026-03-29
Before You Start
You probably have everything already. Node.js v18+, IDE with the Astro extension, and a terminal.
node --version
npm --version
Install & Run
Fork the repo first so updates are easy to pull later. Then clone, install, and you're on localhost in under a minute.
git clone https://github.com/YOUR-USERNAME/your-theme.git
cd your-theme

npm install

npm run dev

npm run build

npm run preview
Fork or Download
Hit Fork, clone your copy, done. When updates drop, add the upstream remote once and pull anytime. Your changes stay intact.
git clone https://github.com/YOUR-USERNAME/your-theme.git

git remote add upstream https://github.com/flux-themes/your-theme.git
git fetch upstream
git merge upstream/main
Project Structure
Every template has a different structure depending on its organization — pages, components, and layouts, all organized.
your-theme/
├── src/
│   ├── components/
│   │   └── BaseHead.astro
│   ├── data/
│   │   └── docs.json
│   ├── layouts/
│   │   └── Layout.astro
│   ├── pages/
│   │   ├── index.astro
│   │   ├── sitemap.xml.ts
│   │   └── about.astro
│   ├── assets/
│   │   ├── images/
│   │   └── styles/
│   └── styles/
├── public/
│   ├── logo.svg
│   ├── favicon.ico
│   └── images/
├── astro.config.mjs
├── package.json
└── tsconfig.json
Astro Configuration
The astro.config.mjs file sets up integrations, output mode, and site-level settings. For this template, the key configs are: output mode set to 'hybrid' (static with server-side rendering for API routes), Vercel adapter for deployment, and the site URL for sitemaps and social previews.
import { defineConfig } from 'astro/config';
import react from '@astrojs/react';
import vercel from '@astrojs/vercel/serverless';
import tailwind from '@astrojs/tailwind';

export default defineConfig({
  // Production site URL — used by sitemap.xml.ts and Open Graph tags
  site: 'https://your-domain.com',

  // Hybrid mode: static by default, SSR for API routes and dynamic pages
  output: 'hybrid',

  // Deployment adapter for Vercel
  adapter: vercel({
    webAnalytics: {
      enabled: true,
    },
  }),

  // Integrations
  integrations: [
    react(),
    tailwind(),
  ],

  // Server-side rendering settings
  ssr: true,

  // Output directory (don't change — vercel expects dist/)
  outDir: './dist',
});
JSON Data Configuration
Content is data-driven. Copy, features, pricing, gallery items, and docs all live in JSON files. Edit one file and the whole section updates.
{
"heading": "Welcome to our site",
"subheading": "Build faster with ready-made blocks",
"cta": {
"label": "Get Started",
"href": "/signup"
},
"seo": {
"title": "Welcome to our site — Build faster with ready-made blocks",
"description": "Build faster with ready-made blocks that load instantly. Edit JSON and ship updates without touching layout code.",
"canonical": "/",
"image": "/images/og-hero.png"
},
"features": [
{
"title": "Fast",
"description": "Loads instantly."
},
{
"title": "Simple",
"description": "Edit JSON, ship updates."
}
]
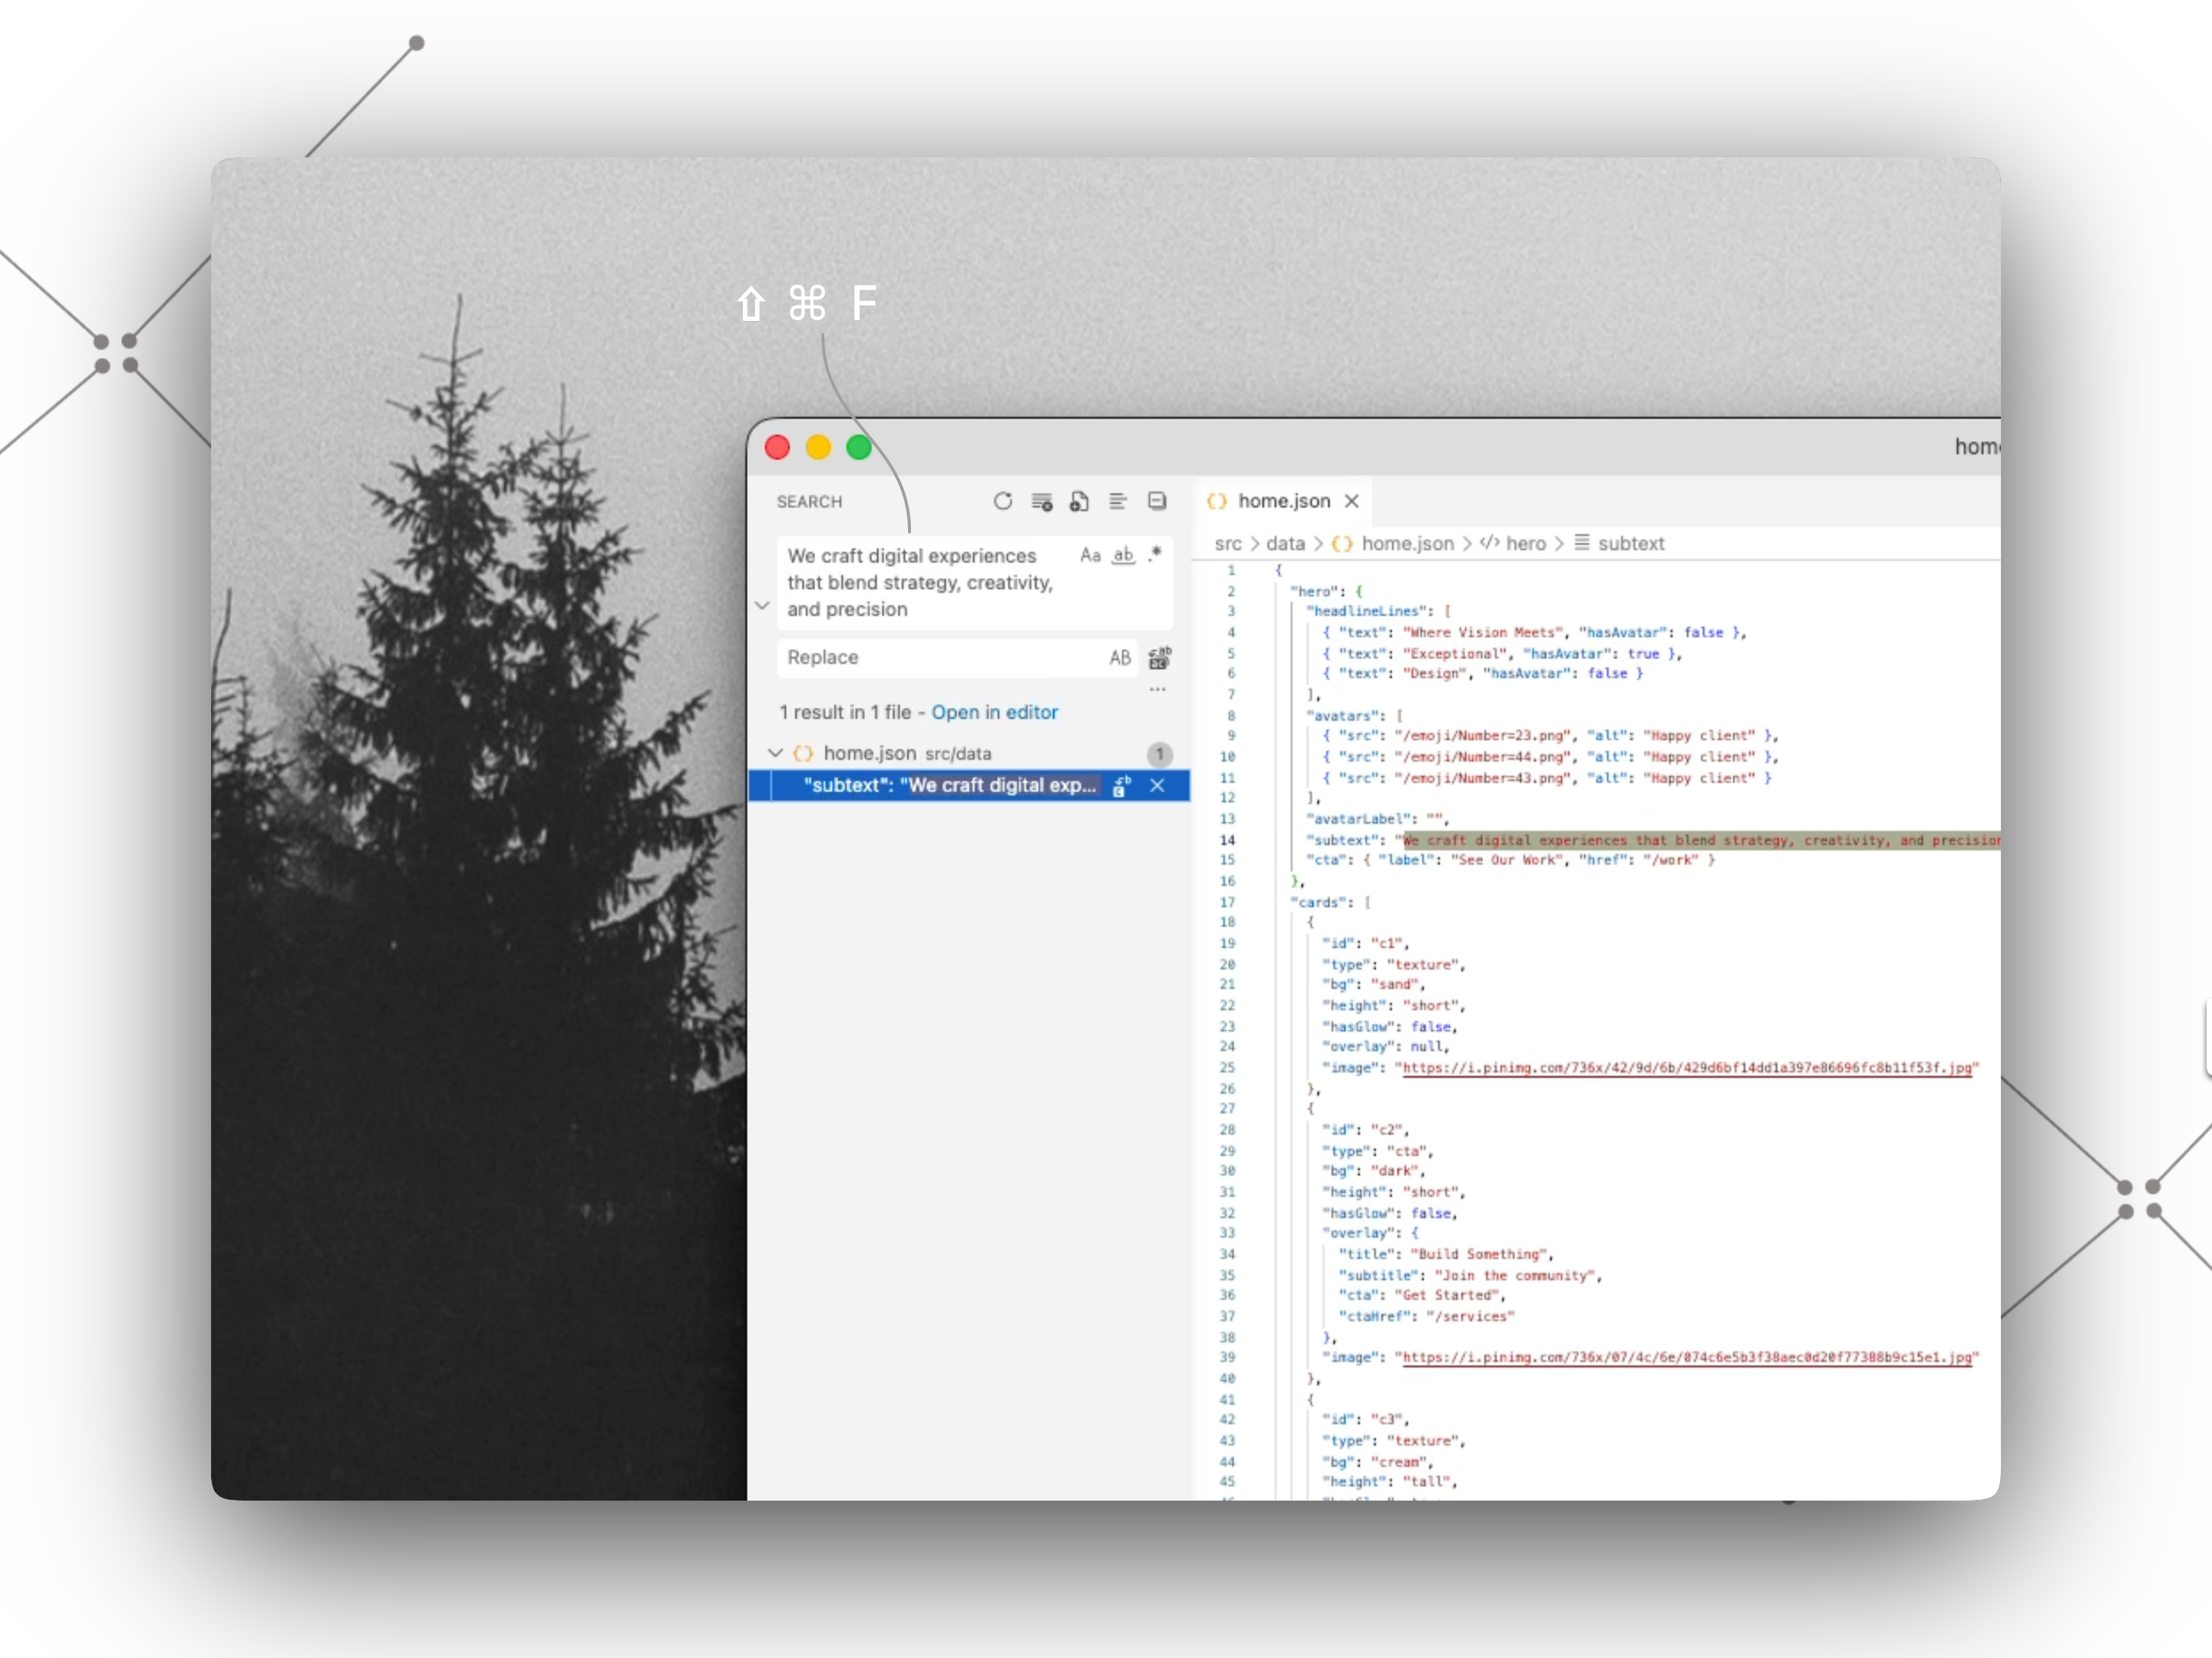
}Find Any Content Fast with IDE Search
Because all content lives in JSON files, the fastest way to edit anything is your IDE's global search. See text on the site you want to change? Copy it, hit Cmd+Shift+F (Ctrl+Shift+F on Windows), paste, and jump straight to the exact JSON file.
# Global search shortcuts
macOS:    Cmd + Shift + F
Windows:  Ctrl + Shift + F

# Example: change the hero headline
1. Copy the headline text from your browser
2. Paste it into the search panel
3. Open the matching src/components/data/*.json file
4. Edit, save — the site hot-reloads instantly
BaseHead & SEO Meta
BaseHead is the central place for site metadata. Title, description, Open Graph tags, Twitter cards, favicons, and fonts. Pass props per page to override defaults.
// Give each page its own tab title, social preview, and URL
<BaseLayout
  title="About Us"
  description="Meet the team behind the coffee."
  url="https://your-site.com/about"
  image="/og/about.jpg"
/>

// Skip the props and it falls back to these
title = "Your Brand"
description = "A short line that tells people what you do."
url = "https://your-site.com/"
image = "/thumbnail.jpg"
Sitemap Configuration
Your sitemap tells Google which pages to index. Edit the file at src/pages/sitemap.xml.ts — just update BASE_URL and add your pages to the list. Visit /sitemap.xml to see the output.
import type { APIRoute } from 'astro';

// 1. Change this to your domain
const BASE_URL = 'https://your-domain.com';

// 2. Add your pages here
const pages = [
  { url: '/', priority: 1.0, changefreq: 'weekly' },
  { url: '/about', priority: 0.8, changefreq: 'monthly' },
  { url: '/pricing', priority: 0.9, changefreq: 'monthly' },
  { url: '/contact', priority: 0.7, changefreq: 'monthly' },
];

export const prerender = true;

export const GET: APIRoute = async () => {
  const today = new Date().toISOString().split('T')[0];

  const sitemap = `<?xml version="1.0" encoding="UTF-8"?>
<urlset xmlns="http://www.sitemaps.org/schemas/sitemap/0.9">
${pages
  .map(
    (page) => `  <url>
    <loc>${BASE_URL}${page.url}</loc>
    <lastmod>${today}</lastmod>
    <changefreq>${page.changefreq}</changefreq>
    <priority>${page.priority.toFixed(1)}</priority>
  </url>`,
  )
  .join('\n')}
</urlset>`;

  return new Response(sitemap, {
    headers: { 'Content-Type': 'application/xml; charset=utf-8' },
  });
};
Deploy
Connect your GitHub repo to Netlify. Build command: astro build. Publish dir: dist/. Done. Auto-deploys on every push, free SSL, custom domain ready.
astro build

[build]
  command = "astro build"
  publish = "dist"
Keep Building
Setup's done. The hard part is behind you. Explore the docs, start editing, or just ship it.